Showing posts with label tutorial. Show all posts

Friday, May 2, 2014

Something to cheer about!

I am so excited to share my take on the Perfect Party Dress by Tie Dye Diva with you today!


A quick reminder that I was given the baby version of this pattern (I already owned the girls version) as part of my participation in this blog hop - and this post contains affiliate links for which I will be compensated if you click through and purchase from Tie Dye Diva (thanks to Jen for the pattern, and for allowing affiliates the potential to earn a little money when we gush about her awesome patterns!).  The opinions shared here and my LOVE for Tie Dye Diva Patterns are honest and not influenced by this compensation! :)

When I saw Kathy's post about this blog hop a picture popped into my mind.  When I looked at the Perfect Party Dress (available in sizes 0-24mo (Baby's Party Dress) and 2T - 8) I saw a perfect canvas for a cheerleader-inspired dress!

We live in WA state - and are big Seahawks fans - so this was a perfect excuse to make some "12th man" (or "12th girl!?") gear!

The Baby's Party Dress and Perfect Party Dress are great as-written - - but they are also a perfect canvas for some "play"!


--------------------------

To achieve a "cheerleader" look I made the following changes to the pattern (I sewed the 6-12 month size from the Baby's Party Dress):

- Change neckline to a v-neck
- Add a contrasting v-accent to the bodice
- Omitted the sash on the front
- Added ties (for a bow in the back) - for more fit customization
- Shortened the skirt by 1"
- created a "peek-a-boo" style skirt

--------------------------


While this won't be a FULL tutorial for all of these changes, I did take some pictures along the way and have tips and tricks to share with you!
Changing the neckline and adding a contrast V to the bodice
To achieve a v-neckline I took my front bodice pattern piece and drew a diagonal line from the shoulder seam to just below the original neckline for two sizes smaller.  This was just what "looked right" - and after sewing it up, it is a great angle and gives the dress a v-neck without it being inappropriate for a kiddo!


I then used that line / angle to create the bodice contrast "v".  Again, I eyeballed where to draw the lines.  I drew the bottom line (closest to the bottom of the bodice) first - as I knew it needed to land high enough to not get caught in the seam allowance.  Then I drew another line between the v-neck of the bodice and the bottom accent line - and wah-lah!  I took a look at the pattern piece and could get a decent feel for how it would look / if I liked the width of the accent.

When I cut out the bodice pieces, I cut the main front (navy blue) and liner (lime green floral) first - cutting around the pattern piece set on the fold.

Next, I folded the bodice pattern on the top line of the accent v.  I then used my ruler to cut 3/8" away from the folded edge of my pattern - so that I had enough "extra" to fold over and iron for a finished edge.  Then I did the same with the bottom line - again don't forget to cut 3/8" away from the bottom edge of the v you drew!

I clipped the inside and outside of the tip of the V and ironed the 3/8" allowance toward the wrong side of the fabric - which resulted in folded / finished edges for the top and bottom of the accent.  Then I just placed it on the front bodice piece and stitched two lines - 1/8" and 1/4" from the top of the accent V; and one line about 1/8" from the bottom of the accent V.


A note about the sleeveless bodice
The baby's party dress pattern includes sleeves.  I wanted to make mine sleeveless to more closely resemble a little cheerleader outfit, so I left the sleeves off.  I followed the directions in the girls pattern for the bodice construction.
Here is a short summary of that process:
- sew the shoulder seams of both the main bodice and the lining
- put the bodice and lining right sides together and sew around each arm hole
- sew the back bodice opening, around the neckline, and back down the other side of the back bodice opening
Leave the sides open and don't sew along the bottom of either the front or the back
- Clip your curves and turn right-side out
Now you can add in your ties (optional) and sew the side seams (making sure to finish the raw edges) by putting the front and back bodice right sides together.  Topstitch around the arm holes and neck / back bodice opening.


Adding ties
I added ties to the dress to allow for a more custom fit (as my model was somewhere between 6mo and 9mo clothes) - and because who doesn't love a bow on a dress!? :)  I don't remember my exact measurements.  I want to say I cut a piece of fabric 4" x WOF, folded it over, stitched it closed with angled ends at both outside edges (near the selvage), then cut it right in the middle so that each tie would be half the width of fabric long and about 1.5" wide (1/2" seam allowance) - but I'd leave you with this tip - measure the space at the side of the bodice (where the front and back connect), subtract your seam allowance for both the arm hole and the bodice / skirt joining, and make sure your ties are skinnier than that measurement!  Mine were a little bit big, so I just added a small pleat / fold in them where they attached to the bodice so that I could make them work!

The peek-a-boo panel skirt
As I noted above, I removed 1" from the length of the skirt.  I did this because I wanted a shorter skirt (because cheerleader skirts are NOT meant to hit below the knee!) - and it worked out well because the dress was a *little bit* big on my model (my adorable Niece!!!).  I'd suggest looking at the finished lengths from the pattern and measuring your kiddo - I could likely have taken off 2" and it would have been even better!

To create the peek-a-boo panel you need a bunch of strips of fabric - I used 8 each of the main (navy) and peek (lime) fabrics.  A little tip because my math / estimation didn't end up perfect..... Make your bodice first.  Get it fully constructed and then measure it!  You want your skirt to be the same width.  So let's pretend your bodice is 24" wide when it's all finished (just throwing out a nice, round number that will make the math for this example simple-de-dimple!).

I want 8 panels to span my 24" skirt.  24/8 = 3" width for each panel.  Now add in your seam allowance (1/2" is a nice round number and allows room to serge all of those seams!).  3" + (1/2" x 2) = 4".  So for this example I would want to cut 8 pieces of each fabric (main and peek) that measure 4" wide by the length of the skirt (from the pattern.... adjusted if you want to).


Phew.... I promise that's all the math (though I have to admit, I love math - it was one of my minors in college!) :)

Now for the construction of the skirt.  Sew together the strips on the long end (the length) - main-peek-main-peek- etc. until you have them all sewn together in a big loop (is it starting to look like a big skirt?!).  I suggest serging or zig-zag stitching each seam allowance so that you don't have fraying when you wash / wear it!  I then pressed all the seam allowances toward the MAIN fabric (navy for me).

Next, hem your skirt.  I followed the directions in the pattern.

Now you need to create the "pleats" / peek-a-boo's.  mark the center of each "peek" panel up at the top (where the skirt will join with the bodice).  Bring both of the adjacent main fabric panels in to meet at the mark you drew on the "peek" fabric.  Pin (or clip) in place and iron the full length of the skirt.  The accent fabric will be hidden under the main fabric - so when you get every panel done, you will just see the main fabric.  Take this skirt over to your machine and run a basting stitch along the top (unfinished) edge to secure your pleats / peeks in place.

Now you just follow the instructions in the pattern to attach the skirt to to bodice.  Keep in mind you *shouldn't* have to gather the skirt at all (though if your math was a little off like mine was when I made my dress, I recommend adding little gathers / mini pleats in the back of the skirt if it's just a little too wide!)  I centered one of the main panels in the front of the dress then worked my way around the bodice when clipping / pinning the two pieces together.

-------------------------

Clear as mud, right?!  I'm hoping to make more of these dresses in the near future - and I promise if/when I do I will take more photos of the process!  In the meantime, please don't hesitate to comment with questions if you have them!

------------------------

What do you think?  I may be biased (because she's my Niece) - but I think my little model makes the cutest cheerleader I've seen!

Want a little more incentive to pick up this pattern and PLAY!?  Jen has put both of the patterns on sale for just $6 to celebrate with us!  (regularly $7.95)  Yippee!!!  I have many of the Tie Dye Diva patterns (okay.... most of them) and love them all!


If you missed any stops along the way - here are the blogs that participated in this week's hop!
Mon. 4/28 - KathyAmyMichelle
Tue. 4/29 - TashaRenAlyssa
Wed. 4/30 - Sara BethShawntaShelly
Thu. 5/1 - JennyMerielVictoria, Nichole
Fri. 5/2 - DeannaZuraKim (that's me!)

A HUGE thank-you to Kathy from Handmade Dress Haven for organizing this blog hop and inviting me to participate - and to Jen from Tie Dye Diva for being our cheerleader and an awesome pattern designer!!!


Monday, April 7, 2014

How-to: Share your dropbox photos


I recently started using Dropbox when my old laptop was on the fritz and I really needed to backup my photos / PDF patterns (there are lots.... of both).  I thought that would be all I'd use them for - but now I'm wondering "What did I do before Dropbox?!"

.... Yes, I'm sure that all five of you who are reading this are thinking "Seriously?!  She JUST started using Dropbox?!"

I know, I know..... I've never been trendy / cool / the first to try something.  So why change now?!

But... it's great.  I use it constantly.  I pull up my PDF patterns, I back up my photos... and even better?!  I can share photos without having to send 18kazillion emails with just as many attachments - simple dimple, one link or one email and the person can see all the photos - and download them if they want.  And I can add to the folder I already shared with them if I add more!

I can also allow others to add to the folder - which has been great when working with photographers / friends who are taking photos and trying to send them to ME! (a separate how-to for that is coming soon!)

So.... a really quick how-to for sharing photos from Dropbox - because there were a few people in a pattern tester group I'm in that were having a hard time figuring it out! :)

Step 1 - open the folder that has the photos you want to share.  Here you see I'm sharing the "LoveMeKnotsTester" photos - you can see all the pictures there in the list.

Now click on that little "link" icon....

This will pull up a window - as seen in the next photo.


You now have a few options!

Option 1: type the email address(es) you want to share the folder with.  You can even include a message in that bigger box.  Then click send!

Options 2 and 3: click on the Facebook or Twitter icons to share using those methods

But maybe you just want the web address....?


Option 4: click on "Get Link" and the link (web address) to your folder will be copied to your clipboard.  Then you can paste (ctrl+v) the link anywhere you want (an email, blog post, Facebook post, message.... the possibilities are endless!)

A little tip: You'll notice the link is also visible in your browser bar - it's the same link!  So you can also copy and paste from there!

-------------------------

Simple de-dimple, no!?

Happy sharing!

Note: this is a how-to for sharing the photos so that others can see them and download them.  If you are wanting to create a collaborative folder (where the person / people you share it with can add to / remove photos from the folder) the process is a little different.  I'll get some photos made up for that and write up another post for that process! :)

Let me know if you have any questions - or if this was helpful - I love to hear from you!

--------------------

I am not affiliated with Dropbox.... at all.  I just use it! :)

Sunday, January 12, 2014

Sew with me Sunday - my applique process

While I don't think I'll be able to post a "Sew with me" every Sunday... I think it will be fun to share little tips and tricks on occasion.  While I am in no way an expert seamstress - I definitely have learned / improved a ton over the last three years.  I guess that's what happens when you do something just about every.single.day. {or at least you can hope that you'd improve / learn!}

I plan on sharing little "tutorials", peeks into my sewing process, and favorite patterns / designers - but I'd love to share things YOU want to learn about.... so whether you've never sewn a stitch in your life... or maybe you have a sewing machine that is almost always sitting in a closet.... or you sew off and on but still have questions.... or maybe you're a quilter who is scared of sewing things like clothes.. or maybe you also sew just about every day but love to see how others work {yup, that's me!} - I'd LOVE to shed some light on the things I've learned / the processes I have adopted!  I'd love to hear what YOU'D love to read / learn about - just leave a comment!

-----------------------------------------------------

One of the top questions I get about my sewing process is about applique.  I have been doing appliqued onesies / shirts since Eggo in the Oven started - and understood the process *for the most part* when I started, but have definitely improved my precision sewing / applique skills over the last 3 years!

The process of applique is pretty simple - thanks to awesome products like Heat 'n Bond Lite iron-on adhesive {or other iron-on adhesives... I just use HNB}.  This post is in no way sponsored by Heat 'n Bond - these are my opinions and a product I have used for years and LOVE!

You can purchase Heat 'n Bond Lite by the bolt / cut from a bolt or in smaller pre-cut packages.  The bolts tend to be on the shelves with other interfacing - often behind or near the cutting counter at the fabric store.

photos from fabric.com

The packages are usually found in the notions aisle.  If you are planning on sewing your applique (not just cutting it out and ironing it on) - make sure you get the Lite version.  There is also Heat 'n Bond Ultra - which is a no-sew iron-on adhesive..... and you do NOT want to throw anything with that on it through your sewing machine!

The iron-on adhesive has two sides - one side is textured, the other side is a smooth paper.  

Gather up your supplies - - - For this project I needed a onesie (not pictured), the various fabrics for each part of my design, my templates (hand-drawn this time around, but you can also use images from your computer, etc.), Heat n' Bond Lite, scissors, and the right needle.  As I said, I was working on a onesie applique and I have found using a 75/11 embroidery needle to be the most consistent tool for the job!  
A little note about using images from your computer to create appliques: Make sure you print them out as a mirror image, or flip them horizontally before printing (or after you cut them out of the paper).  Otherwise your applique design will be "flipped" the opposite direction of the picture on your computer - as we will work with the BACK side of the fabric.  If this is still confusing, I have plans for a post about applique letters in the VERY near future... so hang tight until then.

For the purpose of this post, I worked on an owl applique onesie - one of my first designs and one that I have made so many times I think I could do it in my sleep {or maybe I have done it in my sleep.... during those exhausted "I-have-a-new-baby" months?!}  Anyway.... if you want to see examples of this design - check out my "Animals" onesie / shirt applique album on Facebook.

As you can see in this picture - I used scraps for much of my applique, and I pre-cut my HNB to the general sizes I needed.  A note: all my fabric is pre-washed in free & clear detergent.  This is highly recommended to reduce bleeding / shrinking when the finished item is washed.... and to allow the iron-on adhesive to stick.

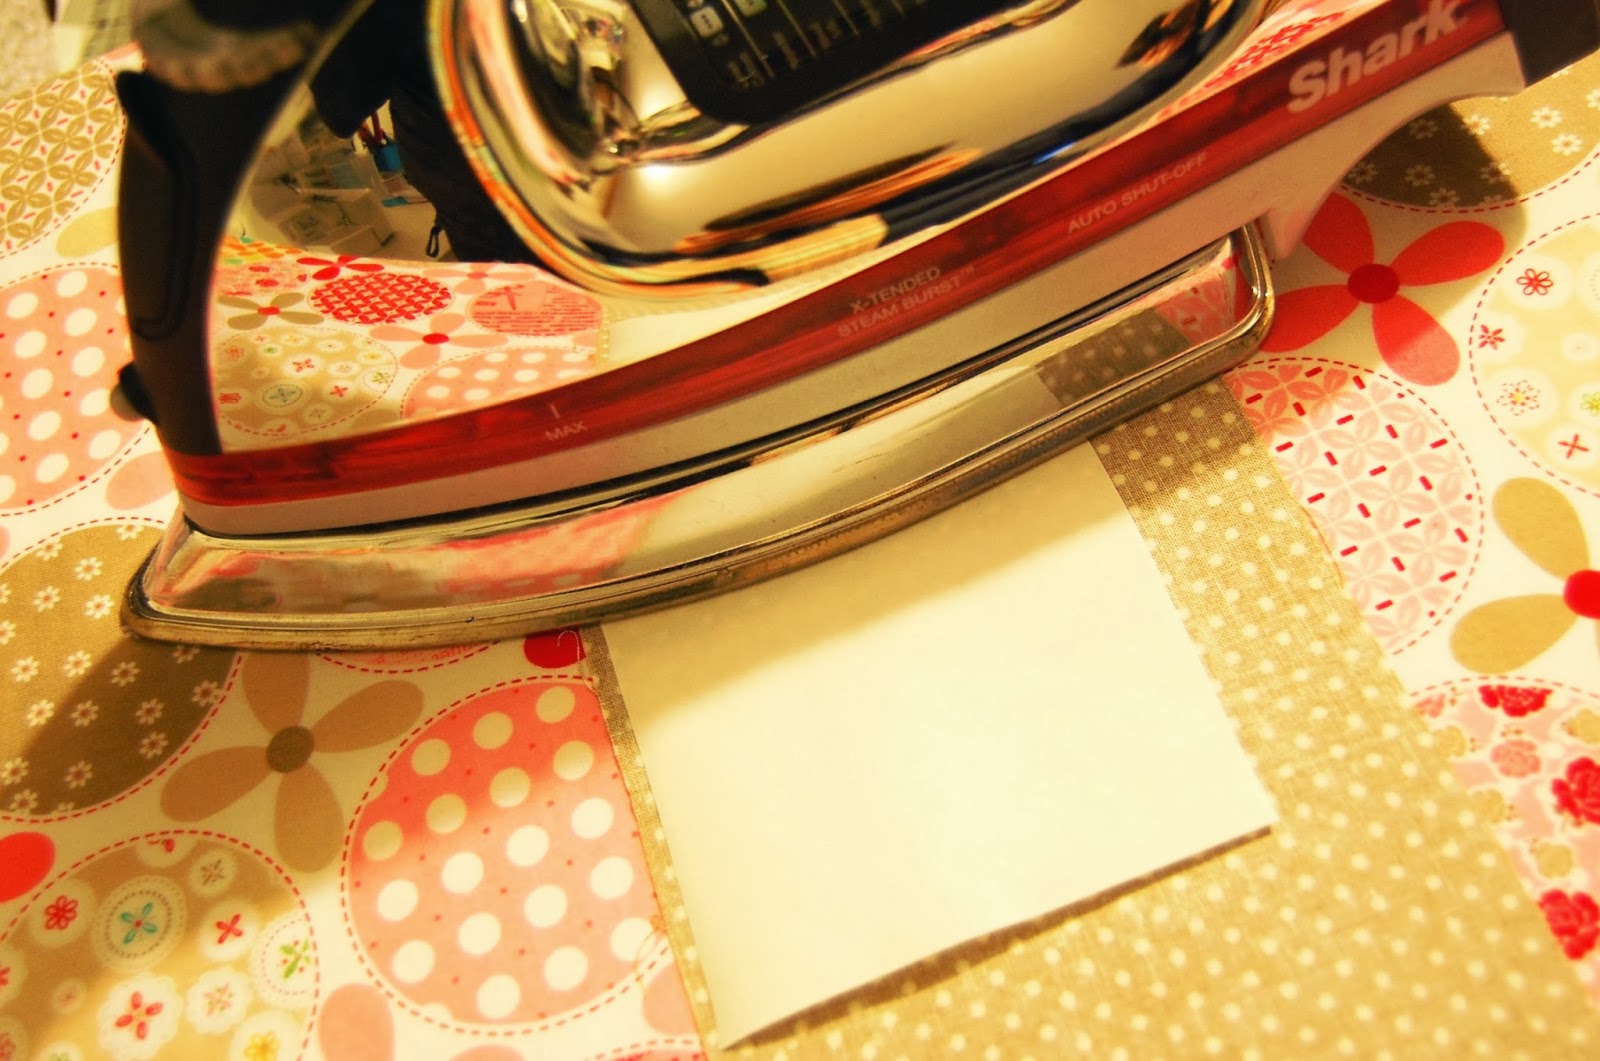
Set your iron to a pretty low, no-steam setting.  For mine it's the wool / silk setting.  Avoid overheating the HNB or it will melt into the fabric and will not allow for adhesion to the item you are trying to stick your applique to!

Now, flip over all your fabrics so that they are wrong-side up.  Lay the HNB Lite paper side UP on the fabric (so the textured side is touching the back side of the fabric) - and iron!

Make sure your fabric piece is bigger than the piece of HNB - otherwise you'll be ironing that sticky stuff onto your ironing board!

Allow this to cool (it will cool quickly!)  Now take your template and trace it onto the paper side of the HNB.  Remember, if you printed something from your computer and did NOT flip it horizontally / print it as a mirror image, you want to flip it over to trace it - so that the printed side is DOWN.

 Here are all my pieces traced and ready to be cut! (there are two wings... they're just stacked... actually I cheat and only trace it once, then put the pieces of fabric right sides together and cut out two layers at once - it produces two pieces that are the mirror image of one another!)

Cut out all of your pieces, following the lines you just traced.  Are you starting to see the cute lil' owl?!

Next you are going to peel the paper off your pieces so that you can expose the other side of the adhesive and iron them onto your item.  If your paper doesn't peel off easily (both the paper and the adhesive are peeling up) - have no fear! - just take it over to your iron, and warm it up a bit more - you probably just didn't iron it *quite* long enough.  Ironing it a little more should get that HNB to adhere.

For multi-part appliques I often iron down the pieces in stages (rather than setting them all on the item and ironing them all down at once) - because little pieces can wiggle / move.  For these owl appliques I often position and iron down the body first, then add the wings / eyes / beak.  Again, your iron should be on a low setting, no steam.

Next, I lay out the rest of the applique pieces - adjusting to get them *just right*

And then I iron them down!  If you are new to applique, don't hesitate to do each piece on its own.  I often do that, and I will just "tack" each piece down (iron it very shortly) so that they are stuck before I move on to the next piece (reduces wiggling / pieces "jumping"!).  Then once all the pieces are down, I'll iron it once more to make sure all of the pieces are fully adhered.  I recommend picking up and setting down your iron - rather than pushing it back and forth across the pieces - less chance of wiggling and more exact placement!

So cute!  Now.... it's time to sew!

Sewing can be tough.  When I first started, my lines weren't as straight / consistent, and I hadn't mastered the art of starting / stopping at corners quite like I am able to today - but that's okay!  This is a handmade item, perfection is NOT expected... and imperfections???  I like to embrace them and call them "character"!

Most of my appliques are sewn on using a zigzag stitch.  The width / length of that stitch really depends on the item / piece I'm stitching.  If you want a pretty consistent, classic zigzag, keep a 2:1 ratio between stitch width and length (like shown below - stitch width is 3.0, length is 1.5)

You'll want to experiment with your settings and decide what width / length stitch you want to use.  For this owl, I use a 3.0 / 0.8 for the black of the eyes, 3.0 / 1.5 for the white and beak, and 3.5 / 1.5 for the wings / body.  Why?  Because I've sewn about a million of these suckers, and those are the ratios I like!  But there is NO right width / length!  Some people prefer a more dense satin stitch (I don't... it takes tons of time, and thread, and shows imperfections MUCH more!) - but try some out and see what you prefer!

Now.... start sewing!  For this project, I already had white thread in my machine, so I started with the white of the eyes.  You want to stitch so that the zig-zag runs right along the outside edge of the piece you are sewing.  I always stitch so that the outside edge is the right-most point of the zigzag - it's habit!  Don't worry if some of your stitches land just outside the piece, and some just inside - it will be fine.  Remember, you have that HNB helping keep the item on - and little bits of fraying, etc., are totally normal with handmade items!  Remember - imperfections add character! 

Then I changed to green thread and did the beak / body / wings.  Lastly I did the black of the eyes (though I didn't take a picture of that).  If you are sewing a onesie, take your time at sharp corners (like the points of the wings).  The onesie material is stretchy and can easily get caught in your machine.  Try not to pull the onesie - try to let the sewing machine do the work for you.

Clip your threads (front and back) - and admire your work!
See how you don't really see most of my stitching - that is because I don't use a dense stitch.  The denser your stitch, the more you'll see it (which is fine - and often looks really nice as it really outlines each piece) - I just love the softness of allowing the fabrics to define the shapes!

If you made it through all of that - YAY!  Have questions?  Feedback?  Other tips / tricks?  Comment below - I LOVE to hear from you!

I have another onesie to make this week that will include appliqued letters - I'll make sure to take pictures of that process which will help better explain the "mirror image" concept, too!