Showing posts with label selfish sewing. Show all posts

Wednesday, May 7, 2014

Sew-a-Bration of Womanhood - a top (and scarf) for ME!


It was with excitement (and a little bit of trepidation) that I recently responded to a call for bloggers to participate in the Sew-A-Bration of Womanhood hosted by two fabulous blogs: the Shaffer Sisters and Call Ajare.  

My body has changed a BUNCH over the years - getting married, having two kiddos, moving our family a few times.... I am no longer the woman I was in college or high school - and my body is no longer the same.  But that is NOT a bad thing - I have to remind myself of this on a regular basis.

Truly embracing our imperfections - in our work, our life, ourselves - is something that I think most women find to be challenging.  But when we do?  The power of that acceptance and the confidence it brings can and will create change!


Recently I challenged myself to make some changes - changes I'm very proud of that are helping to make my outward image reflect what's inside.

So this blog series - centered around celebrating womanhood and bodies of all shapes and sizes - could not have come at a better time.


Inspired by a few friends who do a GREAT job sewing clothes for themselves I decided this was the perfect opportunity to give it a go!

I picked out the Greenstyle Lacy Slope Tank because I loved the versions I saw during their recent blog hop and thought it looked like something that was a) simple enough for me to wear everyday b) simple enough for me to attempt as my first adult clothing item c) had enough style and shape that it would look professional


Here's a bit of honesty:  My body shape..... I'd say it's a "round hourglass" (is that even a shape?  did I just make that up?) - My "girls".... they're big.  Two pregnancies have created some nice curvy hips..... and my belly is my "problem" area - always fluffier than I'd like.

So when I picked my size, I followed the largest measurement - my chest.  After three different shirts... and many photos.... I realized this created a top that was far too big for me.  I ended up taking at least 1" off of each side seam - probably more.  I just kept checking fit and adjusting!  I also decided I wasn't loving the hi-lo look for me (love it on others, though!) - so I got creative and added an accent band to the base of the shirt after cutting it at the highest point (in the front).


The coordinating infinity scarf was a must because I love them and because we live in Washington and still only see the sun every once in a while!  {these photos were snapped quickly between a few BIG rain storms!}

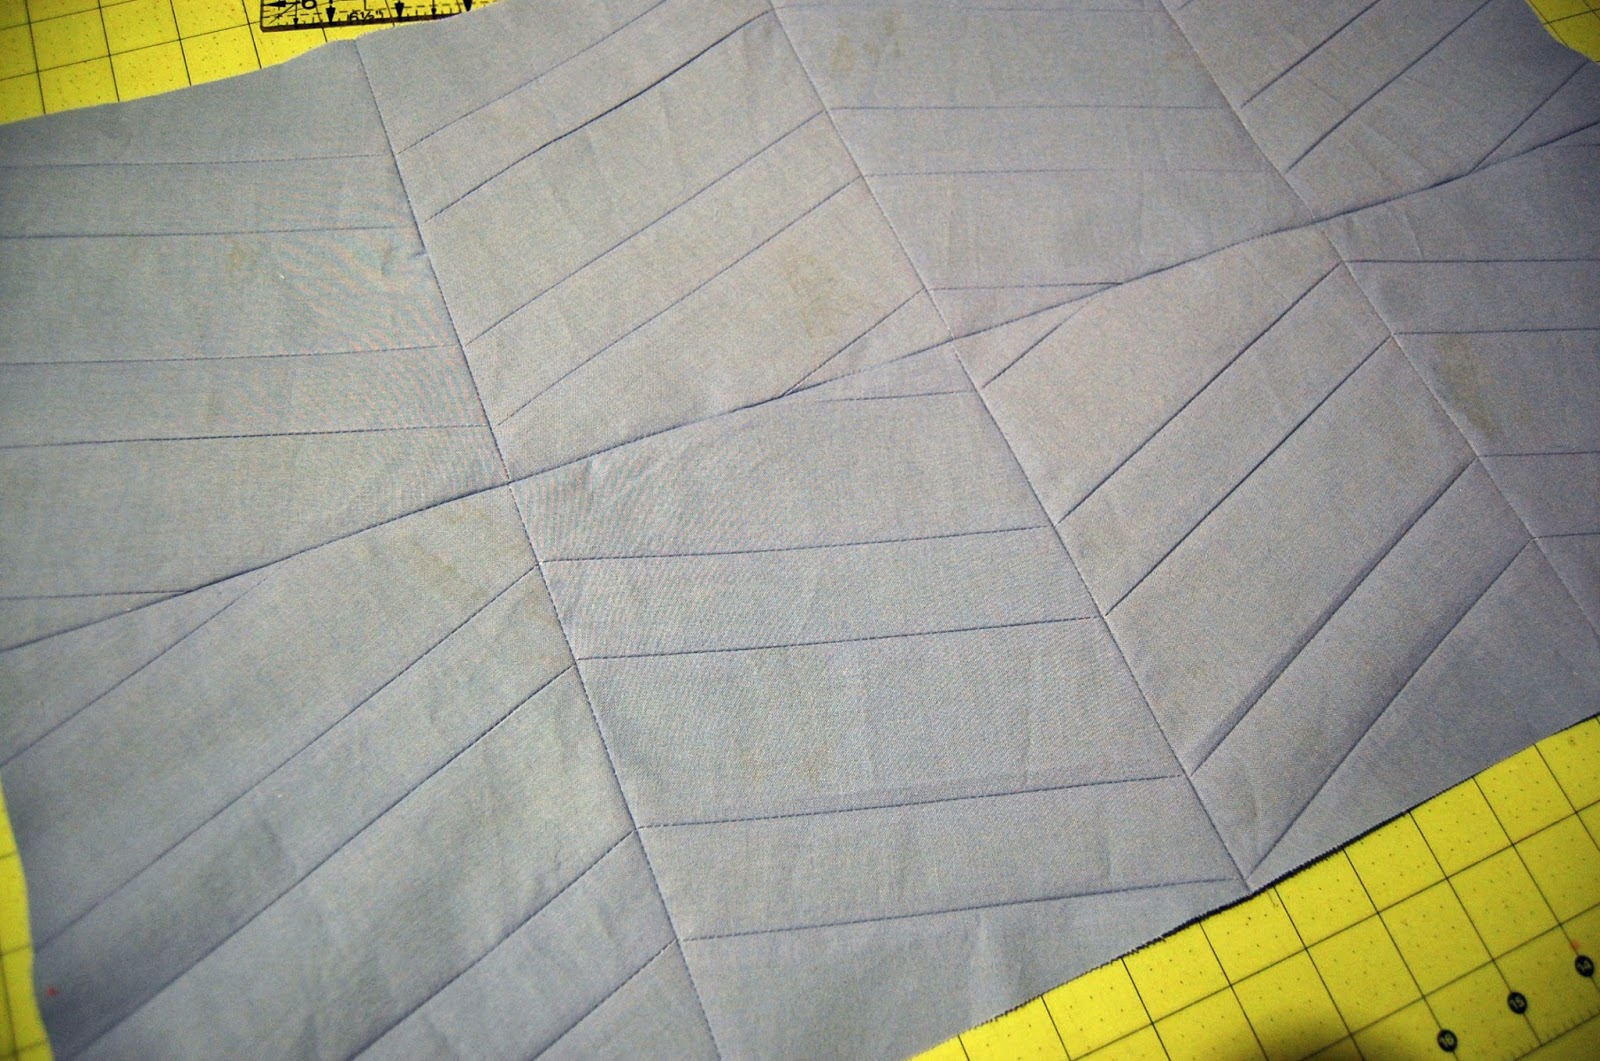
I made it by cutting a piece of knit 8" x WOF.  Then I just used a french seam for the short ends - and wa-lah - cute, lightweight infinity scarf!

All in all - I'm excited to have sewn something for ME - and really do see myself wearing this top on a regular basis.  It's comfy, it's cute, and it IS pretty cool to know that I made it.  BUT..... I have a feeling it will be a while until I attempt more adult clothes sewing!  I'll stick to fun bags / kitchen towels / aprons / quilts for me!


Fabric info: All fabrics purchased at Joann Fabrics - pinky red stripe is from their Doodles line - the other two were from the knit basics / red tag clearance section.

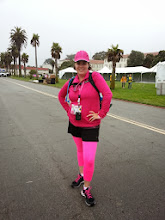
Here's a peek at the "real" me - or the me who is so DONE taking pictures and appreciative of a hilarious husband who is telling me to "work it!"

A big thank you to Shaffer Sisters and Call Ajare for getting me to step outside my comfort zone - and in front of the camera - for this empowering blog series!


Want to see more?  Here are the blogs that will be participating in this sew-a-bration!

Sunday, April 27, 2014

Project Quilting off season challenge 1 & ALYOF April

Pheeeeewey!  Nothing like realizing - while still out of town visiting family - "the Project Quilting challenge ends in 15 hours"..... when for whatever reason I had it in my mind we had until the end of the month.  Whoopsie!

Based on my birthday, June 8th (6/8), I was to use a deep purple and gray for this challenge.  So..... we got home, got laundry started - and I quickly pulled out my purple and gray scraps to get to work!

See more about the challenge by clicking HERE.

April has been a super busy month - my blog has been quieter for sure - and I really have no idea where the month went???

I knew when I originally saw the challenge I wanted to make something for me - because it was based on MY birth date.

So.... today I decided I'd whip up a coffee sleeve!

I get up at 4:30am with my hubby most weekdays to get some work in before my kiddos wake up - so coffee is a MUST around here.  I have a few reusable cups that don't have built in insulation - so they definitely need a sleeve!

Purple + gray + coffee sleeve + ONLY using scraps = this!

www.facebook.com/EggoInTheOven

I did a little bit of straight line quilting through all three layers (cotton / fusible fleece / cotton) along the seams.  

Decaf?!  Yah, right!

Perfect - ready to protect my hand from that delicious, hot, oh-so-necessary java tomorrow morning! 

I love making coffee sleeves - and sell them in my Etsy shop - I'm always willing to cut into any in-stock fabric to make one!

In true Project Quilting fashion here are the details:
This coffee sleeve was (quickly) created in my home sewing studio in Montesano, WA.  It measures approximately 9.5" x 2.5" and is three layers - cotton / fusible fleece / cotton with bits of straight line quilting in a light gray.  Oh... and I'll call it "quick and scrappy"! :)

Linking up with Persimon Dreams - Project Quilting Off-Season Challenge 1
&


Wednesday, April 23, 2014

WIP Wednesday - Avatrix Medallion fabrics

Phew - Wednesday again?!

It's been a LONG week and a half around here - with my main sewing machine needing an unscheduled trip to the repair shop (boo!) and long days / nights of working for the hubby (double boo!).... it's been crazy!  Add to that a to-do list with lots of firm deadlines.... and well, it's been quiet on the blog!

But..... The beginning of this week has brought progress! {thanks to 4:30am starts to my days and sneaking in exercise that helps re-energize me!}

I am feeling a *bit* out of my comfort zone and will definitely be pushing my limits by attempting the Avatrix Medallion Quilt - but I'm excited for the tips & tricks shared by Oh Fransson! during the upcoming quilt-a-long.

I have been wresting with the color scheme / fabric choices.  As in spending HOURS upon hours on a bazillion {yep, that many!} fabric shop websites / blogs / pinterest.  Yikes.

I never work with solids.  Like never ever.  But I'm here to challenge myself.

So my fabric choices are {mainly} solids.  I just *had* to throw a few prints in there (one per color group).


I will be using the white-based "Confetti" in turquoise (part of the Minimalista line for AGF) for my white (because solid white still gives me the heebie jeebies!)

Then I have 5 fabrics in each color group: gray (the one in the middle will also be used for borders), turquoise, green, yellow / light orange, and dark orange / red.  The majority of the solids are Michael Miller Cotton Couture.  There are also a few Pure Elements solids - as well as Laura Gunn's Painter's Canvas (gray textured fabric), Violet Craft's Domino Dots (turquoise), Lizzy House Pearl Bracelet (lime), AGF Chromatics - Pointelle (yellow), and Denyse Schmidt's Dotted Leaf (red).

Want every.last.detail. about each of these fabrics?  Check out my Pinterest Board for this project HERE!

It took me FOREVER to make this decision.  A huge thanks to the friends & family that helped put up with my constant "this turquoise or THIS turquoise?!" questions!

I'm excited that one of my friends is going to split the fabric with me and we will be making matching quilts!  Yippee!  We. Can. Do. This.

My fabric should be here later this week thanks to the super fast shipping over at Hawthorne Threads.  I plan on giving them a look-over once they get here because it's SO tough to gauge colors online - and editing if needed at that point.

If I thought this step was hard I'm REALLY in for it when we actually start MAKING this quilt, huh?!

Care to join in?  You can read more about the sew-a-long HERE.

I am linking up with WIP Wednesday over at Freshly Pieced.  Can't wait to see what everyone else is working on!

Wednesday, March 5, 2014

WIP Wednesday

Earlier this week, my friend and her mom came over so her mom could teach me about foundation paper piecing.  I had read about it, and looked at "how-to's" - but have never attempted it (mainly due to my lack of "free time" - but also because it was a little confusing).  Well, my friend's mom is an awesome quilter who has also written a sampling of FPP patterns - - - awesome!

I had seen their construction line and KNEW they would be the perfect designs for me to start with - as I know Colby would LOVE a construction-themed quilt!

So late last week they dropped by my house with a 3-ring binder full of every pattern printed out and stored safely in plastic sleeves - - - and a bunch of 4T boys clothes {double score!!!}.  Then on Monday, they came to my house, and my friend Kelly played with my boys (though Brendan, the 17 month old was being awfully clingy.... so I also did a bit of one-handed work!) while her mom showed me the basics - and walked me through my first FPP piece - a construction cone {used as a spacer for other construction vehicle blocks}

Isn't it fun?!  

I can't wait to work on the dump truck.... and front loader... and.......!!!!

And yes... I have been pinning other free FPP patterns ever since.....

Linking up with WIP Wednesday at Freshly Pieced - I'm link #167 - can't wait to see what everyone else is working on!

Monday, March 3, 2014

March Goals!

Why hello, March!  Funny how you snuck up on me!

I guess it's time to set some new goals - - - I'll check in on last month's goals soon!

Year-long goal: Do more sewing that is NOT paid orders:
I have decided on a "space" theme for little man #2's room / bedding - thanks to his love of my "Across the Universe" Project Quilting piece.  So I'm hoping to make a few things to go along with that - but that involves buying some fabric.... so I'll have to get through my 100 items first! (though the hubby says this one counts as a "custom order").

I also did my first foundation paper piecing today - thanks to some wonderful in-person, hands-on teaching from a friend's mom.  We did a small construction cone filler block.  She gave me patterns for LOTS of construction vehicles - - - so I hope to work on more blocks here and there to eventually put together a quilt, or wall hanging.... or????  For little man #1's room!

A Lovely Year of Finishes (ALYOF) March
Goal is to finish up Zoe's memory quilt!  Right now it is almost fully pieced - I plan on using a Quilt As You Go method - so I need to quilt the rows, then piece them together, choose (and piece together) backing, and bind!  Phew!  It's a nice big project - and I can't wait to get it finished up!

My Button

Project Quilting 
Challenge #5 - inspired by a trip to the grocery store - was posted yesterday (3/2)!  I've been mulling it over, and flopped between a few different pieces of inspiration - but I WILL be participating!  The last challenge will be posted on 3/16 - can't wait to hear what else we will be inspired by - and see everyone's completed projects!

100 item challenge
I made 54 of the 100 items during the month of January.  My goal for February was to get to 80.... I made it to 77!  But this weekend (the first weekend of March) - I made my way to 86!  Getting close!  I'm actually enjoying sewing through what I have and NOT spending as much time (and money) buying fabric.  The friend who roped me into this challenge (Alyssa from Keep Calm and Carrion) and I are considering allowing ourselves a little window to buy when we get to 100 items..... and then starting the challenge again! (are we crazy?!)

Vice Versa BOM
Can't wait to see what block we are working on this month!  Pattern / instructions will be emailed this Friday 3/7.

Wishes Quiltalong
This one posted early - and I've got it printed out!  Loving how the orange & black blocks are looking together so far!

Aurifil DOM sewalong
Another block, this time from Emily Herrick - looking forward to reading about her, drooling (I'm sure) over her quilts, and working on the block she has shared!

Blog Goals
I still have a few tutorials to share - and I need to fit in some time to share some of the sewing I do that ISN'T quilting!  Funny to me - I keep sharing all these quilting projects..... but I spend a good majority of my time sewing clothes! :)

Other Goals
Finish up my pattern organization (was a goal from February.... I got over halfway done with the patterns I already had printed.... but still want to print out more, and need to get tabs on pages, etc.) - I'm looking forward to this one as I KNOW there are sewing patterns (for clothes.... well, quilts too!) that I own and haven't sewn.... LOTS of them.  Time to dust them off!

Linking up with A Lovely Year of Finishes - March Goal Setting!  I'm link #91

Saturday, February 8, 2014

January Goals Recap!

Hmmm... over a week into the month and I'm finally getting a chance to check-in on how I did with my January goals.... and I promise I have my February goals written up - will post those soon, too!

Main Goal: Do more sewing that is NOT paid orders
I think I did pretty great on this one!  During the month of January I sewed 57 items - and 9 of those items were "just because" / not for paid orders.  Yes, I realize that's only 15.8% - but that is a MUCH higher percentage than I have had in the past.  Included in those 9 items were BOM quilt blocks, some fun "add-ons" to paid orders that were gifts for a friend, and Project Quilting sewing!

A Lovely Year of Finishes (ALYOF) January
Goal was to make a stop sign pillow - and I completed the stop sign pillow on January 13th.  Colby has slept with his head on that pillow every.single.day since! :)

Project Quilting 
I completed challenges 1 and 2 during January - my "Bath Time" wall hanging and a fun construction wall hanging for Colby's room.  A fun bonus: I have won prizes both weeks so far - as one of the random winners!  Score!  Week 1 I won a sewing pattern, and week 2 I won a quilt pattern book.

100 item challenge
Oh gosh - this has been a "fun" one!  Actually - it's been great!  As of January 31 I had made 57 items - not bad for 29 days with a few days completely void of sewing!  As of this post, I have sewn 7 more items, bringing my total to 64.  Oh.... and have I bought fabric?!  NOPE!  I placed ONE order for two half-yards of fabric needed for a custom order - but I found a seller on etsy to buy from - not my usual "big box" online seller that offers free shipping after a certain amount spent (which would have made it REALLY easy to add to my order).  I bought the two fabrics, and that is ALL!  This has been a great challenge for me.  Since I am unable to buy fabric, I have to look at / use the fabric I have on hand.  It's interesting that there are fabrics I still don't tend to work with even when I can't buy a better replacement - - - guess I'll have some fabric to sell soon! :)

Vice Versa BOM
I recruited my mom to do this BOM with me!  I got my blocks sewn up on 1/7 - can you tell I was excited?!  It took me forEVER to decide on the fabrics.... but I'm happy with what I picked!

Wishes Quiltalong
This one was a "maybe" on the list - and I joined in!  I found a FUN quilt pattern that has football blocks - and after I saw that, I thought it would be fun to make a quilt using some of the football blocks as well as all sorts of black / orange / grey / white blocks from a few QALs / BOMs - the hubby and I are Oregon State University alumni and LOVE football - and the team colors are orange & black.  Should be fun and scrappy - and I'll be able to work on it throughout the year and finish it up during football season!
My January block!  These are big blocks - - - 14" plus seam allowance!

Mystery BOM
I decided not to join in on this one.  Didn't feel like my style and I had LOTS of other fun things I was excited about!

Additions
I added one more QAL / BOM - the Aurifil Designer of the Month sewalong.  Each month they're featuring a different designer, who will share a block of their choosing and we'll sew along with them.  January's block was "spools" - so I thought I'd make a block I could eventually make into a wall hanging for my sewing studio. {the fabrics coordinate well with my adorable ironing board cover, and the red face on my beautiful sewing machine.... and all the pink gear I have from my Susan G. Komen 3-day walks!}

For future months, I plan on using fabrics that will create blocks for the black / orange / grey / white / footballs quilt, too.  Oh.... and each month you complete the block you are entered to win a box of Aurifil thread (which I've heard is wonderful.... though I have yet to experience it!)

Phew!  Lots of sewing for January - - - feels good to have gotten so much done (including a bunch of custom orders for my shop, items to stock my Etsy shop (that sold out VERY quickly), and starting on a BIG upcoming project - Zoe's quilt!)

Oh - and one of my non-sewing goals is to find / make more "me" time and.... of course.... eat healthier / exercise more.  A friend of mine started the Bikini Body Mommy 90 day challenge and I saw it as an opportunity to have some measurable, attainable goals - - - Today is day 23 and I have only "missed" one day (and I doubled up my workout the next day to catch back up!) - Wahoo!!!!

I'll get a post written up about February's goals ASAP..... because there are only 20 days left in the month and 9 of those days we're on vacation!  Hahahaha.

Wednesday, January 15, 2014

Don't say BOM on a plane....

.... but you'll definitely hear it a ton around our home! :)

I came across another BOM that I think I'm going to participate in... or at least keep an eye on and make blocks if I like them! It's hosted by Aurifil - and each month one of their designers will share a block of their choice.  An added bonus?  Each month you complete the block and share it in their flickr group you are entered to win Aurifil thread!  I have heard amazing things about this thread - so I'd LOVE the chance to give it a try!

I think the concept is to make a scrappy quilt from all the Designer of the Month blocks.... but when I saw the first block I thought it would be perfect for my sewing room.

January's block is "Chez Claire" by Brigitte Heitland of Zen Chic.  I have LOVED the Zen Chic patterns I have seen.... and her block this month is made to look like thread spools. {see why I thought it would be perfect in my sewing studio!?}

So I jumped in!  I joined the flickr group - and Sunday night I pulled fabrics and got to work.

I wanted my block to coordinate with the super sweet ironing board cover I bought at the end of the year from City Chic Country Mouse on Etsy.  It is made from a Riley Blake fabric that uses tans / greys / pinks / reds / with little hints of green and aqua.  Scarlett, my sewing machine {yes, she has a name!}, has a red face plate - perfect!

I pulled Riley Blake's Verona Gray Flowers for the background, along with Michael Miller's red / white pindot, and green mini geometric print from Jo-Ann.  Then of course I had to use some of my light pink ribbon fabric - after walking two Susan G. Komen 3-day walks (60 miles each in San Francisco and Seattle) last year - as I have a part of my sewing space decorated with all my gear!  I loved that the Daisy Grid from Kari Beyer's Dream a Little Dream for In the Beginning fabrics pulled all the colors together and echoed some of the patterns in my ironing board cover - yay!

Here's my block pieced together - it's really 4 small blocks in one.  You can see my ironing board behind it!

I couldn't decide which layout I liked better.  I would usually default to the greens being diagonal from one another, and the red / pink being on the other diagonal (the layout above) - but because the red / darker green fabrics stood out more than the light pink ribbon fabric / light green fabric.... I decided to swap them around and see what I thought.

 I liked that now the light / dark squares were more equally spaced - it didn't feel as "lopsided" to me.

So I sewed up those final seams... and here is my January block:

As I said.... I think I will make it into a wall hanging for my sewing room.  Maybe a border around the outside.... other little blocks?  I'm not sure!  But for now, it's a 12.5" block!  

Monday, January 13, 2014

ALYOF January 2014 - finished!

As it was my first month of A Lovely Year of Finishes, I made my January goal fairly small / simple - making a stop sign pillow for little man #1's new "big boy bed".

Can you tell he likes it?  I went to take pictures and he said "Are you going to take the picture of the pillow with me??"  Umm.... how could I resist?!

The pillow is about 15.5" across.  I used applique for the letters.. and after consulting some pictures (and a quick chat with the hubby) determined the white band around the outside was necessary.  That took a little more time / effort - but I think it was worth it!

I didn't have enough stuffing (since I've been making some adorable plushies recently!) - but I did have an older throw pillow that we no longer use.... so I cut that sucker open and used the filling from it.  I didn't have *quite* as much as I wanted.... but it works!  


I purchased the red blender fabric from Marcia's Crafty Sewing and Quilting (it's not solid red... though it looks that way in the photos!).  The white is actually muslin (yuck, so thin... but it's what I hand and I'm not allowed to buy fabric until I make 62 more items.... so I made do).  I used two layers of the muslin (to help it be a *little* less see-through) for both the applique and the border.  


So excited to have sewn something for one of my little dudes - I'm thinking next month's goal will be something for Little Man #2 :)

This month's ALYOF is closed (goals have to be posted / linked up by the 7th) - but you can join in next month!
My Button

Friday, January 10, 2014

Handmade Holidays 2013

Thanks to making the tough decision to close my shop for a bit at the end of last year, I was able to complete a BUNCH of projects that had been on my "maybe if I end up with time {HA!}" list.

On that list {in a very general manner} were Christmas gifts for close family / friends.  Did I think that would happen?  NOPE!  But...... I was actually able to find a little bit of time at the end of the year - and this is some of what I came up with!

A personalized zippered pouch and matching mini wallet (made using this Modest Maven tutorial) for my brother's girlfriend {the fabric is one she
picked out herself, and with my help sewed up a cover for her kindle.... so I knew it was one she liked!}


Three sets of hanging kitchen towels (also sold in my Etsy shop - though I really need to add in some non-holiday ones!) - for my parents, my sister & brother-in-law, and my brother

A set of two coffee sleeves for my parents (also available in my Etsy shop!)

And... of course.... the 7 pairs of PJ pants for my boys!


I also sewed our family custom stockings this year - finally - after having stashed fabric for a couple years now (that I didn't end up using!) - and after realizing we must have just grabbed a "sample" stocking for Little Man #2 last Christmas (yup... mom of the year!).  I used the Stockings With Style pattern from one of my FAVORITE pattern writers, Tie Dye Diva Designs.  Can't wait to share more pictures of those very soon!

Tuesday, January 7, 2014

Vice Versa BOM - January Blocks

The Vice Versa BOM (Block of the Month) is my very first sew-along / BOM.  I picked it because I really liked the contemporary look - and as a math nerd, the inverse concept {each month, we'll make two blocks - one traditional, the other the inverse of that!} really intrigued me!

Picking out fabrics was TOUGH!  I knew I was going to be picking from fabric I had on hand {Thanks to my 100 item challenge} - and much of my fabric lends itself more to clothes / larger items, not as much traditional quilting.  But that's okay - - I am in no way traditional, so it's only fitting my blocks / fabric choices wouldn't be!

I tried to pull fabrics.  I pulled various color schemes.  I thought about what / who the finished quilt would be for.  I pulled more fabrics.  I got stuck on the "solid" color "requirement" (for the background) - as I do NOT work in solids (I like them.... I just don't have them... and I can't buy fabric!)

Then I took a step back from my cutting table and out of the corner of my eye I spotted a fabric I've had stashed away for a "someday I'll sew for ME" project.  Ah-ha!  Alexander Henry's Mocca in red.  I think I bought it not long after I opened Eggo in the Oven.  I've sewn with it a few times, but then stashed away the last bit of what I had - for "someday".  It's a beautiful combinations of browns, creams, yellows, aquas, and reds.  I just love the bold floral print and the color combination!

So.... then I had my base - and from there I pulled various fabrics / color combinations until I came up with this:

This selection includes a bit of Riley Blake's Verona (first two photos on left - leaves), Riley Blake Fly a Kite (yellow flowers), Michael Miller's Ta Dot in Teal, a brown / white dotty flower fabric from Joann Fabrics (reminds me of spirograph flowers!), and Alexander Henry's Mocca.  Since I likely don't have enough of the Mocca to use it for all of the blocks, I plan on doing some with that and some with the spirograph fabric.  It's possible I'll need to pull in a few more fabrics if I run out of any of these - but we'll see if / when that time comes!

Today I found time during little man #2's morning nap to cut and piece together my January blocks!
Two pretty blocks - they measure 9.5" square (will be 9" square when in the quilt)

The "traditional" block

The inverse!

I was very excited about how quickly they sewed up - and how they turned out!

This quilt-a-long will DEFINITELY be a test of my patience {I don't have much!} - doing just a *little bit* of the quilt each month?!  Waiting a whole year for the quilt to be finished?  Ahhhhhh!

Good thing I have just a few things going on to keep me busy!

Oh.... and in case you're curious - I'm counting these blocks as ONE item for my 100 item challenge - and they are item #22.  Not bad for less than 5 days in! :)

Want to join in on the fun?  It's only $15 to sign up for the year-long project - - - and the patterns are emailed to you as PDF's each month.  There's a great flickr group where you can see others' blocks, ask questions, etc.  Click below for more info!

Gen X Quilters Vice Versa BOM

Monday, January 6, 2014

"String Along With Me" - FINISHED!

Yes.... finished!

Obviously I was *just a bit* excited about the start of Project Quilting!

Plus... the idea I had was something for OUR home - for a space that I had been meaning to make / display SOMETHING in since we moved in {you know... almost a year ago!}

I had some great sewing time thanks to good naps from the boys yesterday - and it being the weekend so the hubby was home.  I meant to take a break last night and finish up the rest of the week.... but somehow I managed to finish the whole thing and then realized it was WAY past my bedtime! :)

When I left you last I had sewn together my strings in orange, green, grey, brown, and yellow.  And I had a bolt of solid medium blue fabric just hanging out.

Next, I cut strips of the solid blue that were 1.75" and 2.5" wide.  I sewed 6 of them together, alternating between the sizes.  Then I went over to my cutting table and cut 6.5" wide strips at an angle.  I'm not quite sure the angle - - - I just eyeballed it and then repeated - it was 3.5" from where my ruler met the bottom and the top of the strip. Half of the strips were cut one direction, the other half the opposite direction.  The 6.5"???  Yup... done because my ruler is 6.5" wide and it was easy! :)

Okay.... did that sound like a bunch of gibberish to you???  I didn't take a picture during the process... but here's one I just snapped of the concept.  See how the point where the ruler meets the bottom of the fabric is 3.5" to the left of where it meets the top of the fabric?

And if that's still clear as mud - here's a GREAT tutorial done by one of my FAVE quilting bloggers - Maureen Cracknell Handmade {and seriously, you should check out her beautiful quilting / blog.... AMAZING!} - I actually used the tutorial / concept for last year's PQ "Page 28" challenge!  Then I cut each strip of zig-zags to 9" tall - and sewed the two strips together.

I ironed on some fusible fleece for the batting - I like using fusible fleece for wall hangings, etc., because it's a bit stiffer than standard batting (and I have it around & ready to use - I use it for stockings and coffee sleeves!).  I cut a piece of the solid blue that was bigger than my pieced "top" and spray basted the top / fusible fleece piece to the backing.  I went with the solid blue for the back as well because it was going on the wall - so I didn't care what the back looked like!

To help take the chevrons (which I felt did a pretty good job representing water / waves) look even MORE like ripples in the bathtub I quilted some wide horizontal wavy lines.

Somehow I took NO pictures of the applique process - I think because it's something I do SO often - and I was on a roll!  But.... I think I will do a post on my applique process in the near future - it's something I get questions about on a regular basis and I have done TONS of applique over the last 3 years!

For this project, I used Heat & Bond Lite ironed to the back side of the strings, then cut out each letter, ironed them on, andused a pretty wide zig-zag stitch to stitch them down.  I kept my integrated walking foot on my Janome (LOVE that foot) because it was pretty thick and it really helps move smoothly in spite of the layers.

Here it is all quilted and ready to square up / trim - then bind!
Font used: BD Cartoon Shout - find it here

I squared it up to approximately 16" x 25" - then I cut binding strips from various navy fabrics and pieced together a scrappy roll of binding.  Then I machine bound the wall hanging.  I briefly considered adding a hanger (for display) - but I wanted it to stay nice and level... so I just opted to use push-pins to put it on the wall!


I just love how it looks up on the wall - the colors pop, it coordinates great with that shower curtain I LOVE, and I sewed something for US! :)

It's not too late to join in on this week's challenge!!!